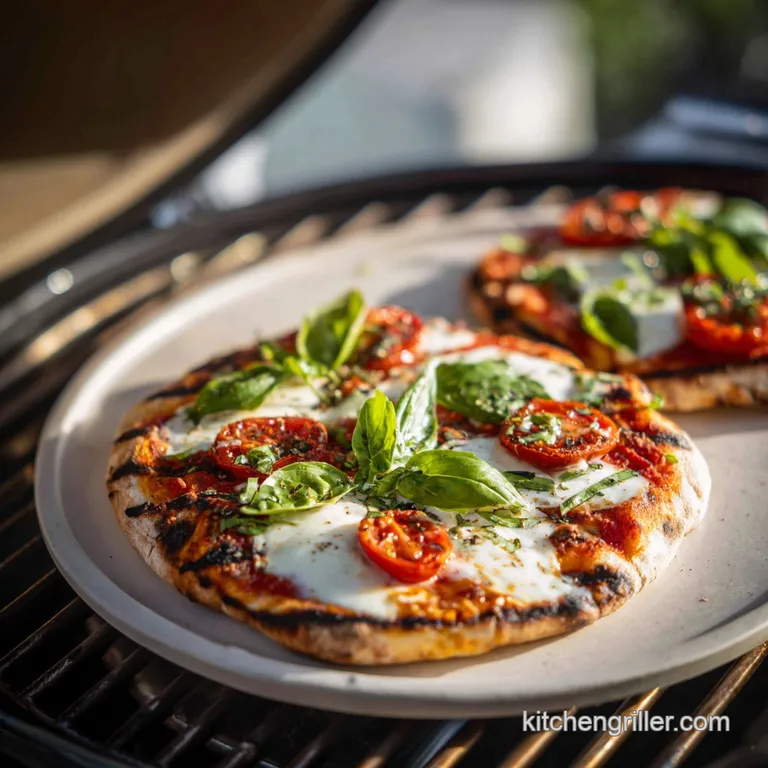
Grilled Pizza on Gas Grill for Beginners
- Time: Active 15 minutes, Passive 10 minutes, Total 25 minutes
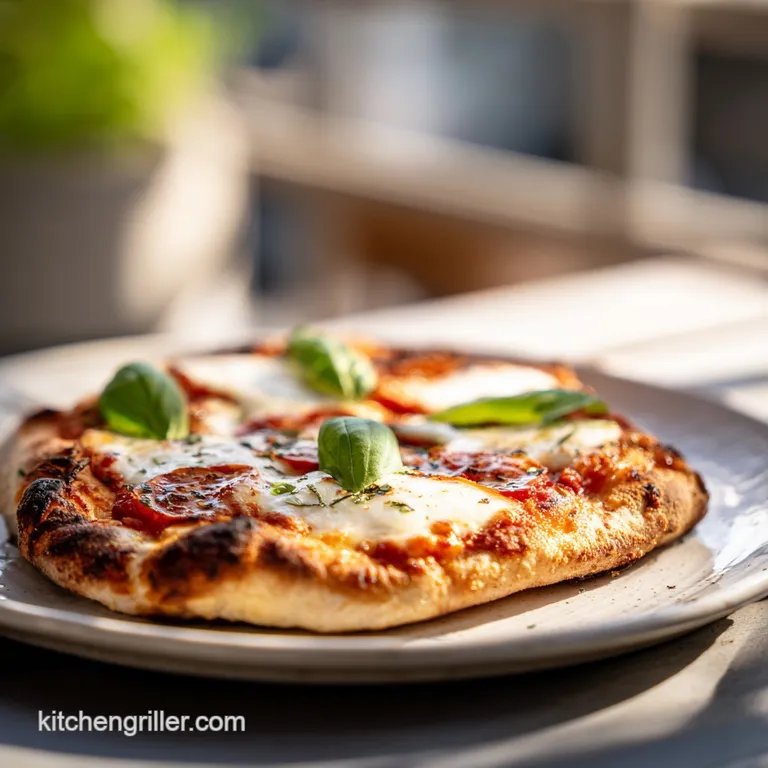
- Flavor/Texture Hook: Shatter crisp charred base with a velvety, melted mozzarella finish
- Perfect for: Fast weeknight dinners or casual backyard entertaining
- Component Analysis of Our Favorite Pizza
- Essential Tools for a Successful Grill Session
- Quality Ingredients for the Best Crust and Toppings
- Step by Step Grilling Method for Crispy Pizza
- Solving Common Pizza Grilling Problems and Mistakes
- Fresh Ideas for Personalizing Your Toppings
- Simple Methods for Storing and Reviving Leftovers
- Best Ways to Serve Your Freshly Grilled Pizza
- Myths About Grilling Pizza
- High in Sodium
- Recipe FAQs
- 📝 Recipe Card
| Cooking Feature | Fast Method (This Recipe) | Classic Wood Fired |
|---|---|---|
| Heat Source | Propane/Natural Gas | Dried Hardwood |
| Total Time | 25 minutes | 2-4 hours (including fire prep) |
| Ease of Use | High (set and forget) | Moderate (requires fire management) |
Many people assume you need a 12 hour rise to get a good pizza. Honestly, room temperature store-bought dough is a brilliant hack for the busy home cook. If you're looking for other fast paced grill ideas, check out our Turkey Burger Recipe which uses similar over high heat principles for maximum juiciness.
Component Analysis of Our Favorite Pizza
The success of a simple Margherita style pizza depends entirely on how the ingredients interact under high heat. Because we are only cooking the second side for a few minutes, every component needs to be ready to perform the moment it hits the heat.
| Ingredient | Science Role | Pro Secret |
|---|---|---|
| 1 lb Pizza Dough | Provides gluten structure | Bring to room temperature 1 hour before use to prevent shrinking. |
| Crushed Tomatoes | Adds acidity and moisture | Strain through a sieve to remove excess water and prevent a soggy crust. |
| Fresh Mozzarella | Provides fat and creaminess | Pat dry with paper towels to ensure it melts without releasing liquid. |
| Extra Virgin Olive Oil | Facilitates heat transfer | Brush the grates and the dough to create a non stick, fried crust texture. |
One mistake I once made was using cold dough straight from the fridge. It fought me every inch of the way, snapping back like a rubber band. Give that dough time to relax on the counter; it makes stretching it into a rustic oval much easier.
Essential Tools for a Successful Grill Session
You don't need a specialized pizza stone for this recipe, though you can certainly use one. I prefer grilling directly on the grates for that authentic char. However, you do need a few specific items to keep the process moving quickly so nothing burns while you're looking for a spatula.
- Long Handled Tongs: Necessary for flipping the dough without getting too close to the intense heat.
- Silicone Basting Brush: For applying that 3 tbsp of extra virgin olive oil evenly across the dough.
- Large Baking Sheet: If you don't have a pizza peel, an inverted baking sheet dusted with 2 tbsp of cornmeal is the ultimate budget hack.
- Fine Mesh Sieve: Crucial for straining that 1 cup of crushed tomatoes.
Chef's Tip: Freeze your block of mozzarella for 10 minutes before slicing. It firms up the fat, allowing you to get clean, even slices that won't tear or turn into a mess before they hit the pizza.
Quality Ingredients for the Best Crust and Toppings
The beauty of a "Classic Toppings" approach is that there's nowhere to hide. You need the right balance of salt, fat, and acid. We use 1 lb of room temperature pizza dough as our foundation, which is the standard size found in most grocery store deli sections.
For the Foundation
- 1 lb room temperature pizza dough: Look for "plain" or "Italian" style.
- 3 tbsp extra virgin olive oil: Use a brand you'd be happy to dip bread into.
- 2 tbsp cornmeal or all purpose flour: This acts as "ball bearings" to slide the dough off your tray.
For the Classic Toppings
- 1 cup San Marzano crushed tomatoes: Ensure they are strained so you're left with a thick, spreadable pulp. Why this? Straining prevents the water from turning your crisp crust into mush.
- 8 oz fresh mozzarella: Sliced or torn into bite sized pieces. Why this? Fresh mozzarella provides a velvety texture that pre shredded bags can't match.
- 1 bunch fresh basil leaves: Add these at the very end to keep them vibrant.
- 0.5 tsp sea salt: To brighten the tomato flavor.
- 0.25 tsp red pepper flakes: For a subtle, warming finish.
If you find yourself with extra basil or tomatoes, they pair beautifully with a Grilled Salmon on recipe the next evening. It keeps the kitchen theme consistent while saving you from ingredient waste.
step-by-step Grilling Method for Crispy Pizza
This is a fast paced dance. Before you even touch the dough, make sure all your toppings are within arm's reach of the grill. You won't have time to run back to the kitchen once the dough hits the grates.
Phase 1: The over High heat Prep
- Ignite the grill. Turn all burners to high and close the lid for 10-15 minutes until the thermometer reads at least 500°F.
- Strain the tomatoes. Place your 1 cup of crushed tomatoes in a sieve over a bowl until the liquid stops dripping. Note: This creates a concentrated tomato "jam" that won't run.
Phase 2: The First Char (The "Set" Phase)
- Prepare the dough. On a surface dusted with cornmeal, stretch the 1 lb dough into a 12 inch rustic oval.
- Oil the surface. Brush one side of the dough generously with olive oil. Note: This side goes down first to prevent sticking.
- Place on grates. Carefully lay the dough oil side down onto the hot grates. Cook for 2 minutes with the lid open.
Phase 3: The Flip and Top
- Flip the crust. Once the bottom is charred and the top has puffed with bubbles, flip it using tongs.
- Apply oil and sauce. Quickly brush the newly flipped side with oil, then spread the strained tomatoes. Note: Leave a 1 inch border for the "cornicione" or crust edge.
- Add cheese. Distribute the 8 oz of mozzarella evenly over the tomatoes.
Phase 4: The Final Melt
- Close the lid. Turn the burners down to medium high and close the lid. Cook for 3-5 minutes until the cheese is bubbling and molten.
- Final garnish. Remove from the grill, sprinkle with sea salt, red pepper flakes, and the fresh basil leaves.
| Thickness | Heat Level | Cook Time (Side 1) | Visual Cue |
|---|---|---|---|
| Thin (1/4 inch) | High | 90 seconds | Deep brown gristle marks |
| Medium (1/2 inch) | Medium High | 3 minutes | Top surface bubbles vigorously |
| Thick (3/4 inch) | Medium | 5 minutes | Dough holds its shape when lifted |
Solving Common Pizza Grilling Problems and Mistakes
The biggest hurdle for beginners is usually the fear of burning the bottom before the top is done. This is why we use the "lid down" technique for the second half of the cook. It turns the grill into an oven, using radiant heat to melt the cheese while the bottom finishes.
For Grilling Pizza Without Burning the Crust
If your grill runs exceptionally hot, you might find the bottom blackens before the cheese even thinks about melting. The fix? Indirect heat. Once you flip the dough and add your toppings, turn off the burners directly underneath the pizza and leave the outer burners on high.
Close the lid and let the ambient heat do the work.
To Avoid Sticky Situations
Dough sticking to the grates is usually a sign of two things: either the grill wasn't hot enough, or you didn't use enough oil. Ensure those grates are scrubbed clean and smoking hot before the dough makes contact. The oil on the dough creates a steam barrier that helps it release naturally once the crust sets.
| Problem | Root Cause | Solution |
|---|---|---|
| Dough Tearing | Cold gluten or over stretching | Let dough rest 10 mins; use palms, not fingertips. |
| Soggy Center | Excess tomato juice or too much cheese | Strain tomatoes for 15 mins; use 8 oz cheese max. |
| Burnt Bottom | Sugars in dough or too much direct heat | Shift pizza to the "cool" side of the grill after flipping. |
Common Mistakes Checklist
- ✓ Don't use cold dough: It will shrink and fail to bubble properly.
- ✓ Avoid "over topping": A heavy pizza is impossible to flip and leads to a raw middle.
- ✓ Clean your grates: Carbon buildup from last week's steak will stick to your dough.
- ✓ Prep everything first: The window between "perfect" and "burnt" is about 30 seconds.
- ✓ Strain your tomatoes: This is the single most important step for a crisp result.
Fresh Ideas for Personalizing Your Toppings
Once you've mastered the classic Margherita style, the gas grill becomes a playground. The smoky environment is particularly good for highlighting certain ingredients that might fall flat in a regular oven.
For a Fiber Boost (Veggie Style)
Try thinly sliced zucchini or bell peppers. Because the cook time is so short, I recommend a "busy" home cook hack: quickly sauté the veggies for 2 minutes in a pan before putting them on the pizza. This ensures they are tender by the time the cheese melts.
For a Nutrient Dense Profile
Swap the standard mozzarella for goat cheese and top with a handful of fresh arugula tossed in lemon juice after the pizza comes off the grill. The residual heat wilts the greens slightly, creating a velvety texture without making them slimy.
If you want a different vibe, try these shortcuts: If you want a Smoky Depth, add 1/4 cup of shredded smoked gouda to your mozzarella mix. If you want Maximum Crunch, sprinkle extra cornmeal directly onto the oiled grates before dropping the dough.
If you want a Garlic Kick, rub a halved raw garlic clove over the charred crust edges the moment it leaves the grill.
Simple Methods for Storing and Reviving Leftovers
Pizza is rarely a "leftover" problem in my house, but on the off chance you have a few slices remaining, don't use the microwave. It turns that beautiful shatter crisp crust into a rubbery disappointment.
- Fridge: Store in an airtight container for up to 4 days. Wrap in parchment paper to absorb any stray moisture from the cheese.
- Freezer: You can freeze cooked slices for up to 2 months. Wrap them individually in foil and then place in a freezer bag.
- Zero Waste Tip: If the crust gets too hard, chop the leftovers into cubes and sauté them in a pan with a little butter. They make incredible "pizza croutons" for a simple side salad.
Reheating Guidelines
The best way to reheat grilled pizza is surprise the grill! Put the cold slices on the grates over medium low heat for 3-4 minutes. Close the lid to trap the heat and melt the cheese again. If you're indoors, a dry cast iron skillet on the stovetop works wonders.
Heat the slice for 2 minutes, then add a teaspoon of water to the pan (away from the pizza) and cover it with a lid for 30 seconds to steam melt the cheese.
Best Ways to Serve Your Freshly Grilled Pizza
Presentation is everything when you've just pulled a charred masterpiece off the grates. Resist the urge to cut it immediately. Giving the pizza 2 minutes to rest allows the cheese to set slightly, so it doesn't all slide off when you run the cutter through it.
The Finishing Touch
A final drizzle of high-quality olive oil and a pinch of flaky sea salt elevates the entire dish. If you're feeling fancy, a drizzle of balsamic glaze adds a sweet tart contrast that cuts through the rich mozzarella.
Perfect Pairings
This pizza is a star on its own, but it loves company. A simple arugula salad with a lemon vinaigrette provides a bright, peppery crunch that cleanses the palate between bites of rich dough and cheese. For a full backyard spread, consider serving this alongside some light appetizers.
It’s a fast, easy way to feed a crowd without spending all night hovering over the stove. Trust me, once your friends hear that first "crunch" of the crust, they'll be asking for your "secret" recipe every weekend.
Myths About Grilling Pizza
Myth: You need a pizza stone to get a crispy crust on a grill. Truth: While a stone helps with heat evenness, the direct contact with the metal grates actually provides a superior char and a faster cook time. The grates act like a searing tool, creating a texture that a stone often softens.
Myth: store-bought dough isn't good for grilling. Truth: Most grocery store doughs are designed for over high heat environments. As long as you let it come to room temperature so the gluten relaxes, it will perform beautifully.
In fact, many "pro" doughs have too high a water content for beginners to handle on open grates.
Myth: You have to cook the toppings at the same time as the dough. Truth: On a grill, you almost always cook the first side of the dough completely solo. Flipping the dough provides a hot, cooked surface to receive the toppings, ensuring the bottom is done at the same time the cheese finishes melting.

High in Sodium
1112 mg of sodium per serving (48% of daily value)
The American Heart Association recommends limiting sodium intake to about 2,300mg per day for overall cardiovascular health.
Sodium Reduction Tips for Your Pizza:
-
Low-Sodium Mozzarella-15%
Opt for low-sodium fresh mozzarella. This simple swap can significantly decrease the overall sodium content of your pizza by up to 15%.
-
No-Salt Added Tomatoes-20%
Use no-salt added crushed tomatoes. This change will substantially lower the overall sodium, reducing it by approximately 20%.
-
Reduce Added Salt-25%
Reduce the amount of sea salt you add to the pizza. Start by using only 1/4 tsp of salt instead of 1/2 tsp to decrease sodium by up to 25%.
-
Spice It Up!
Enhance the flavor with sodium free herbs and spices. Experiment with oregano, garlic powder, or onion powder to add depth without adding sodium (0% reduction).
Recipe FAQs
What is the minimum grill temperature needed to cook pizza properly?
Yes, 500°F is the minimum target. You must preheat all burners to high for 10-15 minutes until the thermometer reads at least 500°F for proper crust setting.
How do I prevent the pizza dough from sticking to the gas grill grates?
Brush the dough generously with olive oil before placing it down. This oiled surface fries slightly upon contact, creating a non-stick barrier and encouraging that crucial char.
Is it true I must use a pizza stone for grilling pizza?
No, this is a common misconception. Direct contact with hot, clean grates provides a faster sear and a better char pattern than a stone.
How to avoid a soggy crust when using fresh tomatoes?
Strain the crushed tomatoes through a fine mesh sieve first. You want a thick pulp, not watery sauce; removing excess moisture prevents steam buildup under the cheese.
How long should the first side of the dough cook before adding toppings?
Cook the first side for about 2 minutes with the lid open. You are looking for the dough to puff up and develop visible char marks before you flip it over to top.
Should I use the high heat setting for the entire cooking process?
No, reduce the heat after the first flip. Keep the initial side high to set the crust, but reduce burners to medium high and close the lid to melt the cheese without burning the bottom.
Can I use this same grilling technique for thicker crusts, like those used in Smoked Mac and recipe?
No, this direct heat method is strictly for thin crusts. Thicker doughs require longer, gentler heat, and if you attempt to cook them this fast, the bottom will burn before the interior cooks through.
Beginner Gas Grill Pizza

Ingredients:
Instructions:
Nutrition Facts:
| Calories | 571 kcal |
|---|---|
| Protein | 20.2 g |
| Fat | 24.3 g |
| Carbs | 60.5 g |
| Fiber | 3.1 g |
| Sugar | 3.6 g |
| Sodium | 1112 mg |
