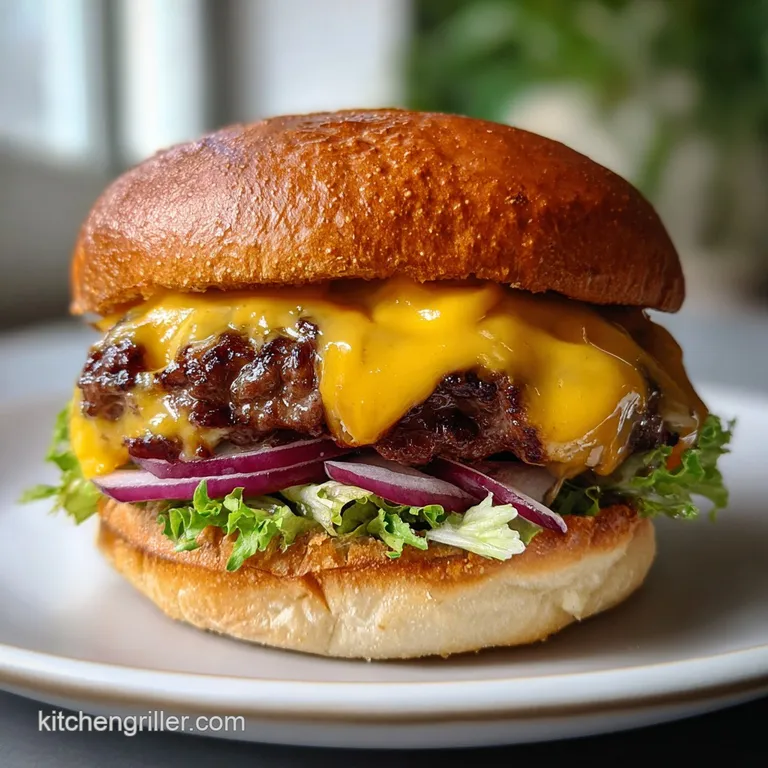
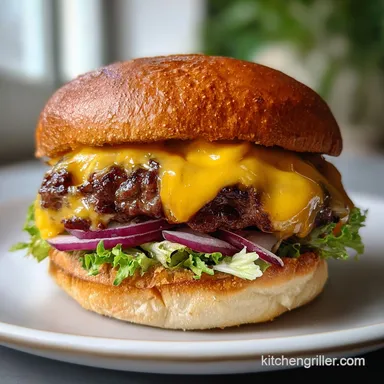
Stuffed Cheddar Burger Recipe Bbq: Juicy Core

- Time: Active 20 minutes, Passive 12 minutes, Total 32 minutes
- Flavor/Texture Hook: Shatter crisp exterior with a molten, extra sharp cheddar heart
- Perfect for: Backyard pitmasters seeking a technical upgrade to the classic cheeseburger
- The Thermodynamics of This Stuffed Cheddar Burger Recipe BBQ
- Technical Specifications for the Ultimate Lab Grade Burger
- Component Analysis for Superior Structural Integrity
- Essential Components for Your Molecular BBQ Prototype
- Required Laboratory Tools for Precision Grilling Success
- Step-by-Step Assembly of the Molten Cheddar Core
- Scientific Solutions for Preventing Structural Burger Failure
- Experimenting with Variable Flavor Profiles and Aromatics
- Preservation Protocols for Long-Term Storage Success
- Optimizing Flavor Pairings for Your Finished Creation
- Dispelling Common Myths in the Burger Laboratory
- Recipe FAQs
- 📝 Recipe Card
The Thermodynamics of This Stuffed Cheddar Burger Recipe BBQ
The first time I attempted this stuffed cheddar burger recipe bbq, it was a disaster of epic proportions. I had the charcoal screaming hot, thinking a fast sear was the answer, only to hear that dreaded hiss as four ounces of cheddar escaped the meat and sacrificed itself to the coals.
The kitchen smelled like burnt milk, and I was left with hollow beef pucks. That failure sent me back to my "lab," which is really just my grease stained patio, to study the structural engineering of a stuffed patty.
Patience is the primary ingredient here, even more so than the beef itself. When you are dealing with a molten core, you aren't just grilling a piece of meat, you're managing a pressure vessel.
We have to treat the beef like a containment unit that must withstand the expanding gases and steam generated by the melting cheese. It’s a delicate dance between the Maillard reaction on the surface and the insulation of the center.
We are going to use a specific double seal technique that I’ve refined over dozens of trials. We aren't just slapping two patties together and hoping for the best. We are building a foundation, inserting the payload, and then chemically bonding the lid. If you follow the technical checkpoints I’ve laid out, you will achieve that legendary "Juicy Lucy" effect without the heartbreak of a blowout. Much like the technique used in my Smoked Meatloaf Recipe, the secret is in the structural integrity of the protein bind.
Technical Specifications for the Ultimate Lab Grade Burger
Thermal Insulation: The 90/10 lean sirloin acts as a dense thermal barrier, slowing heat transfer to the cheese so the meat reaches safety before the cheese exceeds its expansion limit.
Cross Linking Proteins: Salt and Worcestershire sauce help dissolve certain meat proteins, creating a "glue" that allows the two halves of the patty to fuse into a single solid unit.
Vapor Pressure Management: By chilling the stuffed patties before they hit the grill, we ensure the exterior crust forms before the internal steam pressure builds high enough to cause a structural breach.
| Thickness | Internal Temp | Rest Time | Visual Cue |
|---|---|---|---|
| 1.25 inches | 160°F (71°C) | 5 minutes | Beads of moisture on the surface |
| 1.00 inch | 155°F (68°C) | 3 minutes | Firm resistance when pressed |
| 1.50 inches | 165°F (74°C) | 7 minutes | Pronounced swelling of the center |
Choosing the right approach determines the final texture of your bark. In my laboratory trials, I've compared the "Fast" over high heat method against the "Classic" controlled temp method. The results are clear for anyone prioritizing the integrity of the cheese core.
| Method | Temperature | Texture | Risk Level |
|---|---|---|---|
| Fast Method | 500°F+ | Charred/Uneven | High (Core blowouts) |
| Classic Method | 375°F - 400°F | Uniform/Crispy | Low (Controlled melt) |
Component Analysis for Superior Structural Integrity
| Ingredient | Science Role | Pro Secret |
|---|---|---|
| Ground Sirloin | Structural Base | Use 90/10 lean ratio to prevent excessive shrinkage and pocket collapse. |
| Worcestershire | Protein Binder | The acidity denatures surface proteins, helping the "seal" fuse during cooking. |
| Extra Sharp Cheddar | Flavor Payload | Use block cheese, not shredded, to maintain a concentrated molten mass. |
| Smoked Paprika | Phenolic Compound | Adds a "false smoke" depth that mimics Long Term wood firing in minutes. |
The choice of beef is non negotiable in this laboratory. While 80/20 is great for standard burgers, the high fat content causes too much shrinkage. As the fat renders out, the meat fibers contract, putting immense pressure on the cheese center.
By using 1.5 lb lean ground sirloin (90/10), we ensure the burger holds its shape while the 4 oz extra sharp white cheddar remains safely tucked inside.
Essential Components for Your Molecular BBQ Prototype
- 1.5 lb lean ground sirloin (90/10)Why this? Provides the structural density needed to prevent the cheese from leaking out.
- Substitute: 90/10 ground turkey. Note: This will result in a slightly drier texture.
- 1 tbsp Worcestershire sauceWhy this? Adds umami and acts as a chemical binder for the meat fibers.
- Substitute: Soy sauce. Note: Increases saltiness, reduce added sea salt accordingly.
- 1 tsp smoked paprikaWhy this? Provides the signature BBQ aroma without needing a smoker setup.
- Substitute: Liquid smoke (2 drops). Note: Very potent, do not exceed the measurement.
- 1 tsp garlic powderWhy this? Distributes flavor evenly without adding moisture heavy chunks of fresh garlic.
- Substitute: Onion powder. Note: Offers a sweeter, less pungent flavor profile.
- 1 tsp coarse sea saltWhy this? Large grains provide better surface area for protein extraction.
- Substitute: Kosher salt. Note: Use 1.5 tsp if using Diamond Crystal brand.
- 0.5 tsp cracked black pepperWhy this? Adds a sharp bite that cuts through the richness of the cheddar.
- Substitute: White pepper. Note: Provides a more earthy, less "spicy" heat.
- 4 oz extra sharp white cheddarWhy this? High acidity and low moisture mean it melts into a thick, velvety sauce.
- Substitute: Pepper jack. Note: Adds a spicy kick and melts more fluidly.
- 4 whole grain or brioche bunsWhy this? Brioche offers a structural fat content that stands up to burger juices.
- Substitute: Lettuce wraps. Note: Zero carb option, but lacks the ability to soak up cheese leaks.
- 1 cup fresh arugulaWhy this? Peppery notes balance the heavy fat profile of the beef and cheese.
- Substitute: Romaine lettuce. Note: Adds crunch but lacks the distinct peppery flavor.
- 4 thick cut tomato slicesWhy this? Acidity cleanses the palate between bites of rich cheddar.
- Substitute: Roasted red peppers. Note: Adds sweetness instead of bright acidity.
- 4 thin slices pickled jalapeño (optional)Why this? Adds vinegary heat to cut through the heavy protein base.
- Substitute: Pickled red onions. Note: Provides crunch and tang without the chili heat.
Required Laboratory Tools for Precision Grilling Success
To execute this stuffed cheddar burger recipe bbq properly, you need the right gear. A standard spatula won't cut it. You need something thin and flexible (like a fish spatula) to get under the meat without disturbing the seal. I also highly recommend using a digital meat thermometer such as a Thermapen.
Guesswork is the enemy of the pitmaster. If you don't have a grill, a heavy cast iron skillet (like a Lodge) is your best friend for the "oven variation" mentioned later.
The most critical tool, however, is your refrigerator. Most people skip the "chill phase," but this is where the science happens. Cooling the patties for at least 20 minutes allows the proteins to set.
If you put a room temperature stuffed burger on a hot grill, the fat melts before the protein bonds can hold, leading to a structural collapse.
step-by-step Assembly of the Molten Cheddar Core
- Prepare the protein matrix. Place the 1.5 lb lean ground sirloin in a large chilled glass bowl. Note: Keeping the meat cold prevents the fat from "smearing" which ruins the texture.
- Integrate the aromatics. Add the 1 tbsp Worcestershire sauce, 1 tsp smoked paprika, 1 tsp garlic powder, 1 tsp coarse sea salt, and 0.5 tsp cracked black pepper.
- Mix with restraint. Use your hands to gently fold the spices into the beef until just combined. Note: Overworking the meat leads to a rubbery, "sausage like" texture.
- Calibrate the portions. Divide the meat into 8 equal balls, roughly 3 ounces each. Note: Using a kitchen scale ensures uniform cooking across all 4 servings.
- Form the base discs. Flatten each ball into a thin patty about 4 inches wide. Note: Aim for a slightly concave center to hold the cheese payload.
- Insert the cheddar core. Place 1 oz of the extra sharp white cheddar (cut into a 1 inch square) in the center of 4 patties.
- Execute the double seal. Top the cheese with the remaining 4 patties. Pinch the edges together firmly, then roll the burger in your hands to smooth the seam. Note: This creates a seamless "pill" of meat around the cheese.
- Stabilize the structure. Place the patties on a parchment lined tray and refrigerate for 20 minutes. Note: This is the most important step for preventing blowouts.
- Initiate the Maillard reaction. Preheat your grill to a steady 400°F. Grill the patties for 6 minutes per side until the exterior is dark brown and the meat feels firm to the touch.
- Verify the internal state. Insert your thermometer into the meat (not the cheese). Cook until it reaches 160°F.
- Final assembly. Toast the brioche buns, layer the arugula and tomato, and crown with the rested patty.
Scientific Solutions for Preventing Structural Burger Failure
The most common issue I see in the pit is the "ballooning" effect. This happens when steam from the cheese has nowhere to go. If your burger looks like it's about to pop, it probably is. The solution is the "rest phase" both before and after cooking.
Why Your Burger Leaked Cheese
If you see orange oil weeping from the sides of your patty, your seal failed. This usually happens because the edges weren't thin enough when pinched together, creating a weak point. Or, you might have used a high moisture cheese like fresh mozzarella, which creates too much steam.
| Problem | Root Cause | Solution |
|---|---|---|
| Dry Meat | Overcooking or too lean meat | Pull at 155°F and let carryover heat reach 160°F. |
| Cheese Blowout | Weak seal or too much heat | Double check edge crimping; use "Classic" heat method. |
| Raw Center | Patty too thick | Flatten patties more during assembly; use a lid to trap heat. |
Common Mistakes Checklist
- ✓ Never press down on the burger with a spatula (this forces the cheese out of the seams).
- ✓ Ensure the cheese is cut into a thick block rather than shredded (shreds melt too fast).
- ✓ Don't skip the 20 minute fridge rest (it's the chemical "glue" phase).
- ✓ Preheat the grill for at least 15 minutes to ensure even radiant heat.
- ✓ Use a thermometer to check the beef, not just the time.
Experimenting with Variable Flavor Profiles and Aromatics
If you want to move beyond the traditional profile, consider the "Mediterranean Swap." Instead of cheddar, use a firm feta block and swap the paprika for dried oregano. The science remains the same: a firm, low moisture core is required for success. If you are looking for a leaner alternative for a crowd, you might experiment with my Turkey Burger Recipe, though you'll need to be extra careful with the seal as turkey meat is less "sticky" than beef sirloin.
For those who prefer indoor precision, this stuffed cheddar burger recipe bbq oven variation works beautifully. Sear the patties in a cast iron skillet for 2 minutes per side, then transfer the whole skillet into a 400°F (200°C) oven for about 8 minutes.
This provides the most consistent thermal environment, reducing the risk of a blowout to nearly zero.
- If you want a smokier flavor, add 1/2 tsp of liquid smoke to the meat mix.
- If you want a spicier core, press a slice of pickled jalapeño into the center of the cheese block.
- If you want a crispier bun, brush the insides with clarified butter (ghee) before toasting.
Preservation Protocols for Long Term Storage Success
Storing these burgers is tricky because the cheese will solidify back into a hard block. You can keep cooked patties in the fridge for up to 3 days. When reheating, do not use a microwave! A microwave will turn the beef into rubber before the cheese even starts to soften.
Instead, use a toaster oven at 325°F for about 10 minutes. This gently revives the molten core without ruining the exterior bark.
You can freeze these patties raw! In fact, it’s a great way to meal prep. Assemble and seal the burgers, then wrap each one tightly in plastic wrap before placing them in a freezer bag. They will stay lab fresh for 3 months. To cook, thaw them completely in the fridge overnight before grilling.
Never cook a stuffed burger from frozen, or the outside will be burnt to a crisp while the cheese remains a literal ice cube.
Optimizing Flavor Pairings for Your Finished Creation
Because this burger is a "fat bomb" of deliciousness, you need side dishes that provide high acid contrast. I always serve mine with a Creamy Coleslaw Recipe that uses cider vinegar. The tanginess of the slaw cuts right through the heavy white cheddar and sirloin.
If you're feeling adventurous, a side of sweet potato fries seasoned with the same smoked paprika used in the burger creates a nice flavor bridge. The key is to avoid "heavy on heavy." Don't serve this with mac and cheese or you'll be in a food coma before the sun sets.
Stick to bright, crunchy greens or vinegary pickles to keep your palate sharp enough to appreciate the technical perfection of that molten center.
Dispelling Common Myths in the Burger Laboratory
Many "pitmasters" claim you should only flip a burger once. In my lab, I’ve found that flipping every 2 minutes actually leads to more even internal cooking and a better crust.
This is because frequent flipping prevents heat from building up too intensely on one side, which is exactly what causes the internal steam to build and blow out your cheese seal.
Another common myth is that you need to "sear in the juices." Searing creates flavor through the Maillard reaction, but it doesn't actually create a waterproof seal. If you overcook the meat, it will be dry regardless of how hard you seared the outside. Moisture retention is a function of temperature control, not "sealing." For a different take on the "stuffed" concept, you can also look at the Juicy Lucy Burger recipe for oven specific techniques.

Recipe FAQs
What is the ideal beef-to-fat ratio for stuffed cheddar burgers?
Use a 90/10 lean ratio. Higher fat content (like 80/20) causes excessive rendering and shrinkage, which increases pressure on the cheese core, leading to blowouts.
How long should the assembled, stuffed patties chill before grilling?
Refrigerate for a minimum of 20 minutes. This chilling phase allows the meat proteins to set and bind the seal before they are exposed to high heat, which is critical for structural integrity.
How to achieve the perfect internal temperature for a safe and molten center?
Grill until the external beef reaches 160°F (71°C). Use a digital thermometer inserted into the meat portion, ensuring the internal cheese pocket has time to fully liquefy without overcooking the beef.
Is it true that pressing the burger with a spatula helps seal the cheese?
No, this is a common misconception. Pressing down forces the molten cheese out through the seams, resulting in a loss of the molten core and flare ups on the grill.
What seasoning technique helps the two halves of the patty stick together?
Incorporate Worcestershire sauce into the meat mix. The acidity in the sauce helps denature the surface proteins, acting as a natural binder to fuse the seams tightly during grilling, similar to the binding principles used in our Poor Man's Burnt recipe.
Can I cook these burgers in the oven if my grill isn't available?
Yes, an oven works well using a two-stage process. Sear the patties on high heat in a cast iron skillet first, then transfer the skillet to a 400°F oven to finish cooking evenly.
What sides pair best with the richness of a stuffed cheddar burger?
Serve with high acid or crunchy sides. Pairings like vinegary coleslaw or bright, peppery greens cut through the heavy fat content of the beef and cheese, cleansing the palate.
Cheddar Stuffed Burger Recipe
Ingredients:
Instructions:
Nutrition Facts:
| Calories | 578 calories |
|---|---|
| Protein | 47.2 g |
| Fat | 24.5 g |
| Carbs | 28.4 g |
| Fiber | 3.8 g |
| Sugar | 4.2 g |
| Sodium | 785 mg |
