Pizza on a Blackstone Griddle: Shattering Crust
- Time: Active 20 minutes, Passive 6 minutes, Total 26 minutes
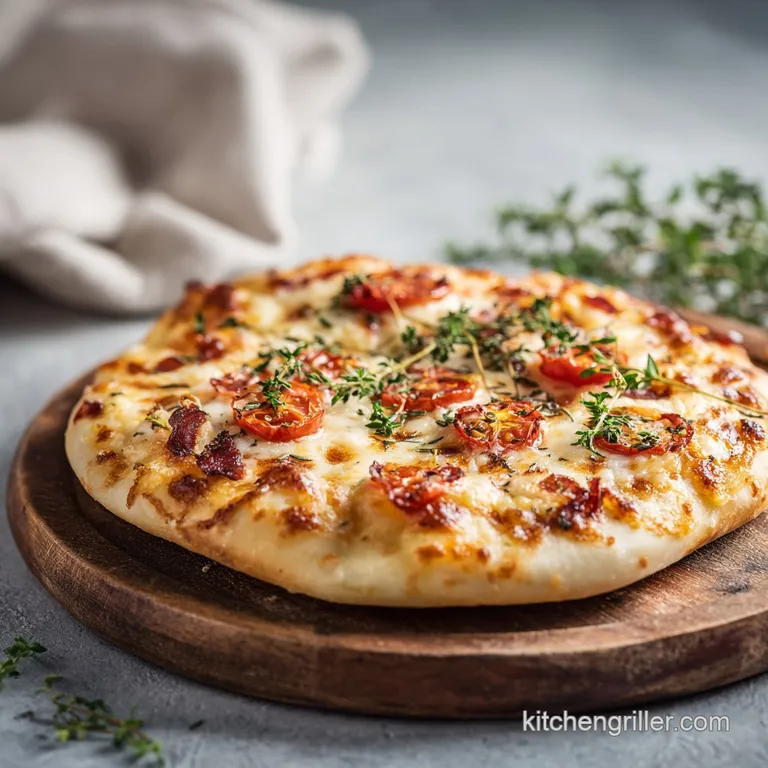
- Flavor/Texture Hook: Shattering crispy base with a smoky, charred aroma and vibrant tomato punch
- Perfect for: High energy outdoor hangouts and busy weeknights when you want bold flavor fast
- Achieving the Ultimate Char with Pizza on a Blackstone Griddle
- Critical Numbers for a Fast Griddle Pizza Feast
- Component Analysis for the Boldest Griddle Results
- Essential Tools for the Smash and Sear Method
- Seven Steps to Griddle Mastery and Smoky Aroma
- Solving Soggy Crusts and Burnt Toppings Fast
- Fusion Flavors and Bold Ingredient Swaps
- Smart Storage and Zero Waste Pizza Strategies
- Bold Pairings for Your Griddle Masterpiece
- Critical Sodium Alert!
- Recipe FAQs
- 📝 Recipe Card
Achieving the Ultimate Char with Pizza on a Blackstone Griddle
You want pizza, and you want it now, but you also want that aggressive, fire kissed crust that usually requires a massive brick oven. I’ve spent years tinkering with oven stones and steel plates, but nothing hits quite like the intense heat of a steel griddle surface.
The first time the aroma of toasted flour and bubbling mozzarella hit my face while standing over the griddle, I knew I was never going to bother with a 45 minute oven preheat again. It is fast, it is bold, and the crust texture is absolutely unreal.
The beauty here is the speed. We are talking about a 6 minute window where the dough transforms from a soft, pale disc into a structured, charred masterpiece. It’s a total rush.
You’ve got the sizzle of the dough hitting the oil, the steam trapped under the dome, and that specific scent of San Marzano tomatoes warming up. It’s not just cooking; it’s an event. If you’ve ever felt like your home pizza was a bit soft or "doughy," this method is your fix.
We’re going for a fusion of classic Neapolitan flavors and the raw power of outdoor griddling. Forget those limp, soggy slices of the past. By using the high conductive heat of the metal, we're forcing the moisture out of the bottom of the crust instantly, creating a structural integrity that can actually hold up all those toppings without folding.
Let’s get that griddle fired up and smash through the old way of doing things.
Critical Numbers for a Fast Griddle Pizza Feast
The secret to why this works isn't magic; it's about how we manage heat across a flat surface. Unlike an oven where the air is the primary cooker, the griddle uses direct contact. This is why we can get such an intense sear in a fraction of the time.
- Thermal Conductivity: The steel plate transfers energy to the dough way faster than hot air ever could, creating an instant crust.
- The Steam Trap: Using a basting dome creates a micro environment that mimics a over high heat dome, melting the cheese while the bottom crisps.
- Zone Control: By keeping one burner low, we create a "safe zone" so the bottom doesn't burn before the cheese is fully bubbly.
- Starch Gelatinization: High heat at the start sets the structure of the bread flour, ensuring the inside stays airy while the outside gets that signature crunch.
| Method | Cook Time | Texture | Best For |
|---|---|---|---|
| Blackstone Griddle | 6 minutes | Shattering, charred base | Quick, bold outdoor flavor |
| Kitchen Oven | 12-15 minutes | Chewy, softer rim | Large batches, indoor comfort |
| Pizza Oven | 2-3 minutes | Soft, blistered, leopard spots | Authentic Neapolitan style |
When you are working with high heat, you need to know exactly when to move that dough. If you leave it on the over high heat zone for even 30 seconds too long, you’ll go from a beautiful char to a blackened mess.
I always keep my infrared thermometer handy because the steel can jump in temperature quickly depending on the wind and ambient air. It’s all about that 425°F (218°C) sweet spot.
Component Analysis for the Boldest Griddle Results
The ingredients you choose are the foundation of this entire build. Since we are cooking so fast, there is nowhere for low quality ingredients to hide. Every element needs to bring a punch of flavor or a specific structural benefit to the table.
| Ingredient | Science Role | Pro Secret |
|---|---|---|
| Bread Flour | High protein (12-14%) creates the gluten network needed to hold air pockets. | Use a long ferment to let enzymes break down starches for better browning. |
| Active Dry Yeast | Provides the biological leavening that makes the crust light instead of a cracker. | Bloom it in 100°F (38°C) water to ensure it's alive and kicking before mixing. |
| San Marzano Puree | High acidity and low water content prevent the "soggy middle" syndrome. | Don't cook the sauce beforehand; let it brighten up on the griddle. |
I've made the mistake of using standard all purpose flour before, and while it works, you lose that "chew" that makes a great pizza. Bread flour is non negotiable if you want that professional feel. Also, trust me on the salt.
10g might seem specific, but sea salt brings out the sweetness in the wheat that you just don't get with standard table salt.
Another huge factor is the water temperature. If it's too cold, your yeast won't wake up in time for our 20 minute prep window. If it's too hot, you'll kill it. Think of it like a warm bath. It should feel pleasant to the touch, not scalding.
Once that yeast starts bubbling and smelling like a brewery, you know you’re on the right track for a massive flavor payoff.
Essential Tools for the Smash and Sear Method
You don't need a mountain of gear, but a few specific items make the difference between a struggle and a win. Most importantly, you need a way to trap the heat. The griddle is great for the bottom, but without a dome, your cheese will just sit there cold while your crust turns to carbon.
- Blackstone Griddle: The heavy hitter. The 36 inch model is great for making 4 pizzas at once, but the 22 inch works just as well.
- Basting Dome: This is the "oven" part of the equation. It traps the steam from the sauce and the heat from the griddle to melt the mozzarella.
- Infrared Thermometer: Don't guess. You need to hit 425°F (218°C) for the best results.
- Long Handled Spatulas: You need leverage to flip and move the dough without getting too close to the heat.
- Pizza Peel or Screen: Great for moving the pies to the cool zone or taking them inside once they are done.
Chef's Note: If you don't have a professional basting dome, a large stainless steel bowl or even a disposable aluminum roasting pan flipped upside down works in a pinch. Just be careful with the steam when you lift it!
If you are looking to expand your griddle repertoire beyond just pizza, you have to try this blackstone griddle potato recipe which uses the same over high heat principles to get a crust on spuds that is to die for. The griddle is basically a flavor enhancing machine once you learn how to handle the surface zones.
Seven Steps to Griddle Mastery and Smoky Aroma
This process is all about timing. Once that dough hits the steel, you have to be ready to move. Have all your toppings sliced, your cheese torn, and your sauce open. There is no time for chopping once the sizzle starts.
- Calibrate the surface. Set two burners to Medium High and one to Low (this is your safe zone). We are aiming for 425°F (218°C). Note: Using a "safe zone" prevents the crust from burning while you're adding toppings.
- Prep the dough. On a floured surface, hand stretch the 500g of fermented dough into 10 inch rounds. Keep the edges thick to preserve those beautiful air pockets.
- The direct sear phase. Place the bare dough rounds directly onto the hot side of the griddle. You should hear an aggressive sizzle immediately.
- Watch for the flip. Once the bottom is browned and you see bubbles forming on the top surface (usually about 2 minutes), flip the dough onto the cooler zone.
- Build the flavor. Apply the 240ml of tomato puree, the 225g of torn mozzarella, and the 60g of grated Parmigiano Reggiano to the side you just seared.
- Add the crunch. Toss on the sliced bell pepper and cover the whole thing with your basting dome. Note: This traps the steam, which is what actually melts the cheese and softens the pepper.
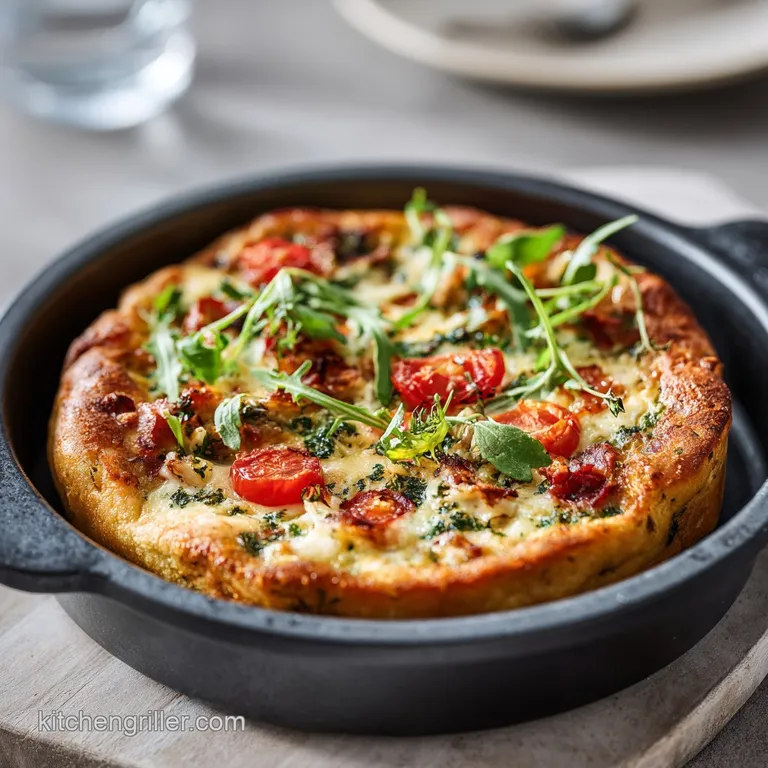
- Finish and garnish. After about 3-4 minutes under the dome, remove the pizza from the heat. The cheese should be bubbling and the crust should be firm. Finish with the fresh arugula and 1 tbsp of crushed red pepper flakes.
The aroma at step 6 is incredible. When you lift that dome, you’ll get a blast of steam that smells like sweet tomatoes and roasted peppers. It’s the moment of truth. If the cheese isn't quite as melted as you like, just give it another 45 seconds.
The red pepper flakes at the end add that bold heat that cuts through the richness of the mozzarella perfectly.
Solving Soggy Crusts and Burnt Toppings Fast
Griddle cooking is intense, and things can go sideways if you aren't paying attention. The most common heartbreak is a bottom that looks like a hockey puck while the cheese is still a solid block. This usually happens because the heat was too high or you didn't use the dome correctly.
For a Shattering, Non Soggy Base
If your crust is floppy, it’s usually because of one of two things: too much sauce or not enough initial heat. San Marzano tomatoes are great because they aren't watery, but even then, don't drown the dough. A thin, vibrant layer is all you need.
Also, make sure that griddle is actually at temperature before the dough touches it. If it’s too cool, the dough will absorb the oil and get greasy instead of crispy.
| Problem | Root Cause | Solution |
|---|---|---|
| Blackened Bottom | Surface temp exceeded 450°F or stayed in the hot zone too long. | Move to the "safe zone" immediately after flipping and building. |
| Raw Dough Middle | Dough was stretched too thick or heat was too high/fast. | Stretch to 10 inches and ensure it's thin in the center; use the dome. |
| Rubber Cheese | Not enough steam trapped under the dome. | Squirt a teaspoon of water near the pizza before doming to create steam. |
Common Mistakes Checklist
- ✓ Never use cold dough straight from the fridge; let it sit at room temp for 30 minutes so it stretches easily without tearing.
- ✓ Don't skip the "safe zone" calibration; having a cool spot on the griddle is your only insurance against a burned crust.
- ✓ Avoid over topping the pizza; too much weight prevents the dough from rising and makes it impossible to move.
- ✓ Always check the underside with a spatula every 60 seconds once the dome is on.
- ✓ Keep the bell peppers sliced very thin so they soften in the short 6 minute cook time.
Fusion Flavors and Bold Ingredient Swaps
I love the classic Margherita vibe, but the griddle is built for experimentation. You can take this in a hundred different directions depending on what's in your fridge. If you want something even more substantial, you could even use the griddle to prep some protein first, like in these blackstone pollo asado burritos, and then use that citrusy chicken as a topping.
| Original Ingredient | Substitute | Why It Works |
|---|---|---|
| Bread Flour | 00 Flour | Creates a softer, more traditional Neapolitan texture but burns easier. |
| Fresh Mozzarella | Low Moisture Mozzarella | Melts faster and more evenly with less "weeping" of water onto the crust. |
| Bell Pepper | Pickled Jalapeños | Adds a vinegar punch and sharp heat that balances the fatty cheese. |
For a High Protein Thin Crust
If you want to lean into the protein, swap half the bread flour for a high-quality gluten-free blend or add some unflavored collagen peptides to the dough. It changes the stretch slightly, but the griddle's high heat helps set the structure of alternative flours much better than a standard oven.
You'll get a crunch that feels more like a flatbread but with all the pizza soul.
Scaling the Recipe Up or Down
If you are feeding a crowd, you can easily double this. For 8 servings (1kg flour), keep the salt and yeast at 1.5x rather than a full 2x to avoid an overly salty or "yeasty" flavor. When working in large batches, the griddle actually gets better as it maintains a more consistent heat.
If you need to scale down for a solo lunch, just halve everything, but use a whole egg yolk in the dough to keep the richness and moisture levels high in smaller quantities.
Smart Storage and Zero Waste Pizza Strategies
Leftover pizza is a gift, but only if you store it right. If you just throw it in a plastic bag, that beautiful shattering crust we worked so hard for will turn into a rubbery mess by morning.
- Fridge
- Store slices in a single layer wrapped in foil or in an airtight container for up to 4 days.
- Freezer
- You can freeze the cooked slices for up to 2 months. Just wrap them individually so you can grab one at a time.
- Reheating
- Whatever you do, do NOT use the microwave. It’s the enemy of the griddle crust. Toss the slices back onto a over medium heat skillet or the griddle for 2-3 minutes. It will bring that crunch right back to life.
Zero Waste Tips: Don't toss those bell pepper scraps! Sauté them right on the griddle next to the pizza and save them for an omelet the next morning. If you have leftover dough, roll it into small balls, fry them on the griddle with a bit of butter, and toss them in cinnamon sugar for a quick "griddle donut" treat.
Also, that arugula that didn't make it onto the pizza? It makes a killer peppery pesto if you pulse it with some olive oil and the leftover Parmigiano Reggiano.
Bold Pairings for Your Griddle Masterpiece
Since this pizza has that smoky, charred personality, you want sides and drinks that can stand up to it. I usually go for something bright and acidic to cut through the heavy cheese and the richness of the olive oil.
- The Drink: A cold, hoppy IPA or a crisp sparkling water with a heavy squeeze of lime. The carbonation cleanses the palate between those cheesy bites.
- The Side: A simple cucumber and red onion salad tossed in red wine vinegar. It provides a cool, crunchy contrast to the hot, soft pizza.
- The Dip: If you're a crust dipper (no judgment here), whisk some of that crushed red pepper into a bit of honey. "Hot honey" on a charred griddle crust is a flavor explosion that you won't forget.
Ultimately, the best part about making pizza on a blackstone griddle is the atmosphere. It’s loud, it’s hot, and it smells like a dream. It turns a standard dinner into a performance. Don't worry about making the circles perfectly round.
Those jagged edges and irregular charred spots are where the most flavor lives. Just get in there, embrace the heat, and enjoy the most vibrant pizza you’ve ever made in your own backyard. It’s brilliant, fast, and completely addictive.
Trust me, once you hear that first crunch, there’s no going back to the oven. Let's crack on and get cooking!

Critical Sodium Alert!
1219 mg of sodium per serving (53% of daily value)
The American Heart Association recommends limiting sodium intake to 2,300mg per day, with an ideal limit of 1,500mg for most adults.
Actionable Tips to Drastically Reduce Sodium:
-
Halve the Sea Salt-25%
Reduce the 10g fine sea salt in the dough to 5g. This is the largest single contributor to sodium in your recipe.
-
Swap Cheeses-15%
Replace half of the Parmigiano Reggiano (30g) with a low-sodium alternative like nutritional yeast or a small amount of aged Gouda. Consider using half the fresh mozzarella (112.5g) as well.
-
Choose No-Salt Added Tomato Puree-10%
Opt for no-salt added San Marzano tomato puree. Most canned tomato products contain added sodium, even if not explicitly stated.
-
Moderate Red Pepper Flakes
While not a major source, you can slightly reduce the crushed red pepper flakes if you're sensitive to heat, though this will have minimal sodium impact.
-
Boost Flavor with Herbs and Spices
Incorporate fresh or dried herbs like basil, oregano, garlic powder, and onion powder to enhance flavor without adding sodium.
Recipe FAQs
Can I cook a pizza on a flat top griddle?
Yes, the flat top griddle is excellent for pizza. You achieve a crispy, charred crust similar to a wood fired oven by direct searing the dough on the hot steel.
Should pizza be at 375 or 400?
Neither, aim for 425°F. Maintaining a surface temperature of 425°F (218°C) provides the necessary heat to blister the dough during the six-minute cook time.
How long do you cook pizza dough on Blackstone?
Cook for a total of 6 minutes. This includes the initial direct sear phase on the hot griddle surface followed by the steaming phase under a basting dome.
What is grandma style pizza?
No, this recipe focuses on round, thin crust artisan pizza. Grandma style typically refers to a rectangular, pan-baked pizza with a thicker, focaccia like crust.
Why is my dough tearing when I try to stretch it?
You are using dough that is too cold. Let the dough sit at room temperature for 30 minutes before stretching to relax the gluten, ensuring it maintains its structure without tearing.
How to keep the bottom from burning?
Use the safe zone calibration. Set two burners to Medium High and one to Low so you have a cooler area of the griddle to move the pizza to after the initial sear. If you enjoyed mastering this surface heat management technique, the same logic applies when searing proteins to prevent charring.
Is it true I should load the pizza with toppings?
No, this is a common misconception. Over topping adds too much weight, which prevents the dough from rising properly and makes it difficult to handle when flipping on the griddle.
Pizza On Blackstone Griddle
Ingredients:
Instructions:
Nutrition Facts:
| Calories | 732 kcal |
|---|---|
| Protein | 30.3 g |
| Fat | 19.8 g |
| Carbs | 105.7 g |
| Fiber | 5.8 g |
| Sugar | 4.2 g |
| Sodium | 1219 mg |
