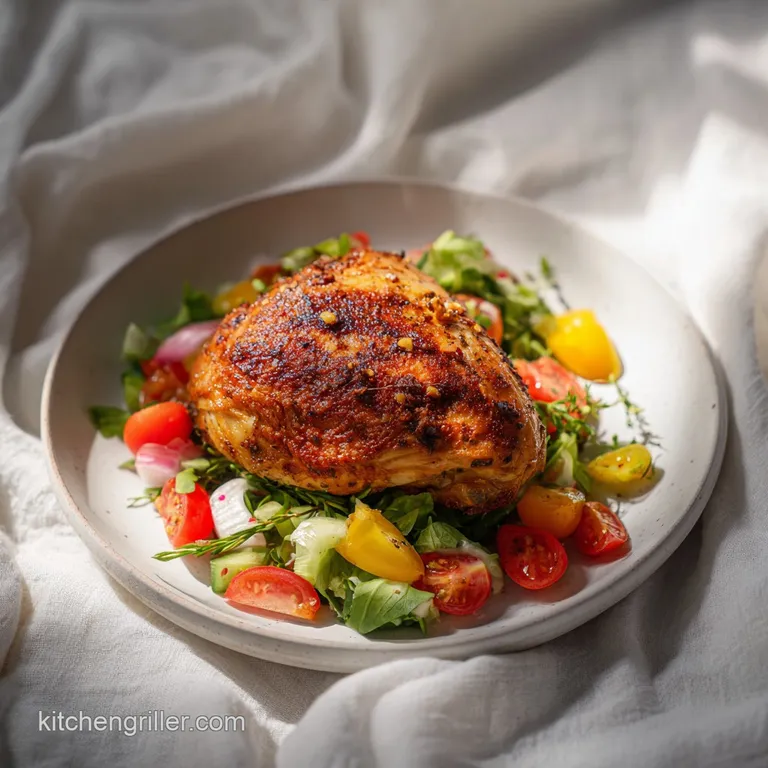
High Protein Meal Prep Lunch with Roasted Chicken
- Time: Active 15 minutes, Passive 45 minutes, Total 1 hours
- Flavor/Texture Hook: Savory smoked paprika with crispy edged Brussels sprouts
- Perfect for: High performance meal prep and busy urban professionals
- Master the Ultimate High Protein Meal Prep Lunch
- Why This Roasted Chicken Strategy Actually Works
- Essential Components for This High Protein Meal
- Tools to Achieve a Vibrant Urban Roast
- Step by Step Guide to Perfect Results
- Avoiding Common Pitfalls and Soggy Vegetables
- Smart Swaps for Diverse Flavor Profiles
- Myths About Roasting and Prep
- Keeping Your Prep Fresh for Five Days
- Styling Your Plate for a Cafe Quality Vibe
- Critical in Sodium
- Recipe FAQs
- 📝 Recipe Card
Master the Ultimate High Protein Meal Prep Lunch
The smell of smoked paprika hitting a hot sheet pan is honestly the only thing that gets me through a Sunday afternoon prep session. I remember my first attempt at a High Protein Meal Prep Lunch years ago.
I used boneless breasts, overcooked them until they had the texture of a yoga mat, and paired them with mushy broccoli that smelled like a middle school cafeteria. It was miserable, and by Wednesday, I was ordering takeout.
This article features a simple, delicious high protein meal prep lunch recipe starring roasted chicken.
We are moving away from the "sad desk lunch" vibe. I’ve learned that the secret to a prep lunch you actually look forward to is all about managing moisture and layering textures. This recipe isn't just about hitting your macros, though 58 grams of protein is a serious flex.
It's about that sizzle when the pan comes out of the oven and the vibrant colors that make your coworkers jealous. You deserve a meal that tastes fresh on Thursday, not just on Sunday.
Trust me, once you try this bone in method, you won't go back to those dry, frozen chicken strips. We’re using a cast iron approach if you have the pans, or standard heavy duty sheets, to get that deep caramelization on the sweet potatoes and a satisfying shatter on the outer leaves of the Brussels sprouts.
It's a total vibe, it's fresh, and it's going to change your weekday routine.
Why This Roasted Chicken Strategy Actually Works
- Maillard Reaction: High heat triggers a chemical reaction between amino acids and reducing sugars, creating that deep brown crust and complex savory flavor on the chicken skin and sweet potatoes.
- Thermal Buffering: The bones in the chicken thighs act as insulators, slowing down the heat transfer to the center of the meat, which prevents the protein fibers from tightening and squeezing out all the juice.
- Osmotic Brining: Mixing the kosher salt with the spices and applying it early draws moisture out of the surface, then dissolves the salt into a brine that is reabsorbed, seasoning the meat deeply.
- Starch Gelatinization: The sweet potatoes cook in the rendered chicken fat, causing the starches to swell and break down into a velvety texture inside while the exterior crisps up.
| Thickness | Internal Temp | Rest Time | Visual Cue |
|---|---|---|---|
| 1.5 inch (Bone in) | 175°F | 8 minutes | Juices run clear, skin is tight |
| 1 inch (Boneless) | 165°F | 5 minutes | Opaque center, no pink |
| 0.5 inch (Strips) | 165°F | 3 minutes | Firm to the touch, browned |
While many people aim for 165°F for chicken, bone in thighs are much better at 175°F. The extra heat helps break down the connective tissue around the bone, making the meat fall off-the bone tender rather than rubbery.
This is a critical detail for a Meal Prep Lunch with Roasted Chicken because the meat holds its structure better during reheating.
Essential Components for This High Protein Meal
| Ingredient | Science Role | Pro Secret |
|---|---|---|
| Bone in Thighs | Fat retention | Leave the bone in during the roast to keep the meat from shrinking excessively. |
| Sweet Potatoes | Complex carb | Cube them small (1 inch) to ensure the starch breaks down at the same rate the chicken cooks. |
| Lemon Juice | Acid balance | The citric acid cuts through the heavy fats of the chicken, making the whole meal feel lighter. |
| Avocado Oil | High smoke point | Allows for 400°F roasting without the oil breaking down and tasting bitter or burnt. |
Using the right fat makes a huge difference. While I love olive oil for finishing, avocado oil is the MVP for the actual roasting phase. It handles the heat of a 400°F oven without smoking out your kitchen.
This ensures your High Protein Meal Prep Lunch tastes clean and fresh, not like a burnt grill.
Brining Prevents Cardboard Texture
The 1.5 tablespoons of kosher salt isn't just for flavor. It changes the physical structure of the chicken. By dry brining even for the 15 minutes of your prep time, you’re allowing the salt to denature the protein.
This means the muscle fibers won't contract as much when they hit the heat, keeping those juices locked inside.
Wire Racks Kill Sogginess
If you want that urban rotisserie vibe, roast the chicken on a wire rack set over your baking sheet. This allows hot air to circulate under the meat. Without it, the bottom of the chicken sits in its own juices and the skin gets flabby. For a Prep Lunch, you want the most texture possible to survive the fridge stay.
Perfect for Muscle Gain
With 58 grams of protein per serving, this is a powerhouse. It’s significantly more effective than many store-bought "protein bowls" that usually top out at 20 or 30 grams. By prep cooking 5 lbs of chicken at once, you’re ensuring your body has a steady supply of leucine to trigger muscle protein synthesis all week long.
Tools to Achieve a Vibrant Urban Roast
To get this recipe right, you’ll need the 5 lbs bone in, skinless chicken thighs and your vegetable lineup. We are going for a balance of textures here: the heartiness of sweet potatoes, the crunch of Brussels sprouts, and the sweetness of red bell peppers.
- 5 lbs bone in, skinless chicken thighs Why this? Maximum juice and protein content without the excess saturated fat from skin.
- 2 tbsp avocado oil Why this? High smoke point for a perfect sear.
- 1.5 tbsp kosher salt
- 1 tbsp smoked paprika
- 1 tbsp garlic powder
- 1 tsp cracked black pepper
- 1 tsp dried oregano
- 3 large sweet potatoes, cubed Why this? Sustained energy and great color.
- 1 lb Brussels sprouts, halved
- 2 red bell peppers, sliced
- 1 tbsp extra virgin olive oil (for veggies)
- 1 pinch sea salt and red pepper flakes
- 1/4 cup fresh parsley, minced (for drizzle)
- 2 cloves garlic, grated
- 1 lemon, juiced and zested
- 3 tbsp extra virgin olive oil (for drizzle)
| Feature | Fresh Whole Ingredients | Pre Cut Shortcut |
|---|---|---|
| Flavor | Vibrant, sweet, and bright | Can be muted or slightly oxidized |
| Texture | Firm and crisp | Often softer due to moisture loss |
| Cost | Budget friendly | 30-50% price markup |
If you're in a rush, you can totally use pre cubed sweet potatoes. Just keep in mind they tend to dry out faster in the oven because they've already lost some surface moisture in the bag. If you use them, toss them with an extra teaspoon of oil to compensate.
step-by-step Guide to Perfect Results
Step 1: The Brine
Pat the 5 lbs of chicken thighs completely dry with paper towels. In a small bowl, whisk together the 1.5 tbsp kosher salt, smoked paprika, garlic powder, black pepper, and oregano. Rub the 2 tbsp avocado oil over the chicken, then coat thoroughly with the spice mix.
Note: Drying the surface is the only way to get a good sear; moisture is the enemy of browning.
Step 2: Veggie Prep
Toss the cubed sweet potatoes, halved Brussels sprouts, and sliced red bell peppers on a separate large sheet pan with 1 tbsp extra virgin olive oil, a pinch of sea salt, and red pepper flakes. until every piece is lightly glistening. Don't overcrowd the pan or they will steam instead of roasting.
Step 3: Oven Entry
Preheat your oven to 400°F (200°C). Place the chicken on a wire rack over a baking sheet and put the veggie tray on the rack below it. Note: Putting chicken on top allows any stray drippings to season the veggies below.
Step 4: First Roast
Roast for 25 minutes. until the sweet potatoes start to soften. This initial blast of heat sets the crust on the chicken and begins the caramelization of the natural sugars in the vegetables.
Step 5: The Flip
Remove the veggie tray and give them a good toss with a spatula. Rotate the chicken tray 180 degrees to ensure even cooking. until the aroma of toasted garlic fills the room.
Step 6: Final Cook
Return both trays to the oven for another 15 to 20 minutes. until the chicken reaches an internal temp of 175°F. You want the Brussels sprouts to have dark, crispy edges that look almost charred.
Step 7: Herb Drizzle
While the food roasts, whisk together the 1/4 cup parsley, 2 grated garlic cloves, lemon juice, lemon zest, and 3 tbsp olive oil. Note: This adds a fresh, zippy finish that wakes up the cooked flavors.
Step 8: The Rest
Let the chicken rest for at least 8 minutes before even thinking about touching it. until the juices redistribute into the meat. If you cut it too soon, all that moisture we worked so hard to keep will end up on the cutting board.
Step 9: Portioning
Divide the veggies into five containers and top each with the roasted chicken. Drizzle the herb sauce over everything while it's still warm so the flavors can soak in.
Avoiding Common Pitfalls and Soggy Vegetables
Why is Skin Soggy?
Even though we are using skinless thighs, the exterior can still get gummy if there’s too much steam in the oven. This usually happens if you try to crowd everything onto one pan. This recipe is massive 5 lbs of chicken is no joke. Use two pans. This isn't just a High Protein Meal Prep Lunch; it's an exercise in airflow. Similar to the technique used in our High Protein Sheet recipe, giving your ingredients space is the difference between "roasted" and "boiled."
No Wire Rack?
If you don't have a rack, you can create a "natural rack" by slicing an extra onion or two into thick rounds and resting the chicken on top of the onion slices. The onions will caramelize in the chicken fat and become a delicious bonus side dish.
It’s a classic urban cooking hack that keeps the meat from sitting in a pool of liquid.
| Problem | Root Cause | Solution |
|---|---|---|
| Rubbery Chicken | Under rendered fat | Cook bone in thighs to 175°F, not 165°F. |
| Mushy Sprouts | Overcrowded pan | Use two sheets or roast in batches. |
| Bland Potatoes | Lack of salt | Season potatoes separately before roasting. |
Common Mistakes Checklist
- ✓ Forgot to pat the chicken dry before adding oil and spices.
- ✓ Used a cold sheet pan instead of preheating the oven fully.
- ✓ Crowded all the veggies into a single layer with no gaps.
- ✓ Sliced the chicken immediately after taking it out of the oven.
- ✓ Skipped the lemon zest in the final drizzle (it needs that zing!).
Smart Swaps for Diverse Flavor Profiles
If you want to scale this recipe down for just two people, it's pretty simple. Use half the chicken (2.5 lbs) and reduce the sweet potatoes to two small ones. The cook time stays mostly the same because the thickness of the chicken thighs doesn't change, but you should check them 5 minutes earlier just in case.
When scaling up for a huge family or a 10 day prep, work in batches. Don't try to shove four trays in the oven at once; the temperature will drop too much and you'll lose the crispy texture.
For the spices, if you're doubling the recipe, don't just double the salt. Start with 1.5x the salt (about 2.25 tbsp) and taste a small piece of the veggie mix. You can always add more at the end, but you can't take it out. If you're looking for a lighter side to go with this, you might enjoy the brightness of a Cottage Cheese Salad recipe on the side of your reheated chicken.
| Goal | Ingredient Swap | Flavor Impact |
|---|---|---|
| Low Carb | Cauliflower florets | Sweeter, less bite than sprouts. |
| Extra Heat | 1 tsp Cayenne pepper | Adds a lingering back of-throat glow. |
| Mediterranean | Dried thyme & Lemon | Earthier flavor profile than paprika. |
Add a Spicy Kick?
If you're a fan of heat, swap the smoked paprika for a chipotle powder. It gives the same smoky depth but adds a punchy spice that works beautifully with the sweetness of the roasted peppers. I sometimes add a drizzle of hot honey right before sealing the meal prep containers for that sweet heat combo.
Myths About Roasting and Prep
One of the biggest myths is that you have to sear the meat in a pan first to "lock in the juices." Science tells us that's not true. Searing creates flavor via the Maillard reaction, but it doesn't create a waterproof seal.
For a Prep Lunch with Roasted Chicken, the over high heat oven roast does all the flavor work you need without the extra mess of a stovetop sear.
Another misconception is that you should peel sweet potatoes. Honestly, don't even bother. The skin contains a ton of fiber and it gets wonderfully crispy in the oven. Just give them a good scrub. It saves you ten minutes of prep time and adds a rustic, urban texture to the dish that makes it feel more substantial.
Keeping Your Prep Fresh for Five Days
Store your High Protein Meal Prep Lunch in airtight glass containers. Glass is superior to plastic for reheating because it doesn't retain odors and provides a more even heat distribution in the microwave. These will stay fresh in the fridge for up to 4 days.
If you’re pushing it to day 5, I recommend freezing that last portion as soon as it cools on Sunday.
To freeze, make sure the chicken and veggies are completely cold. Wrap the chicken thigh in foil before putting it in the container to prevent freezer burn. It will stay good for up to 3 months.
When reheating, a splash of water or an extra squeeze of lemon juice before microwaving will create steam, which helps revive the chicken so it doesn't dry out.
Zero Waste Tip: Do not throw away those bones! Since you're using 5 lbs of bone in thighs, you'll have a pile of bones at the end of the week. Toss them into a pot with some celery scraps, carrot peels, and water.
Simmer for 4 hours, and you’ve got a high gelatin bone broth for your next soup. It's liquid gold and costs you absolutely nothing.
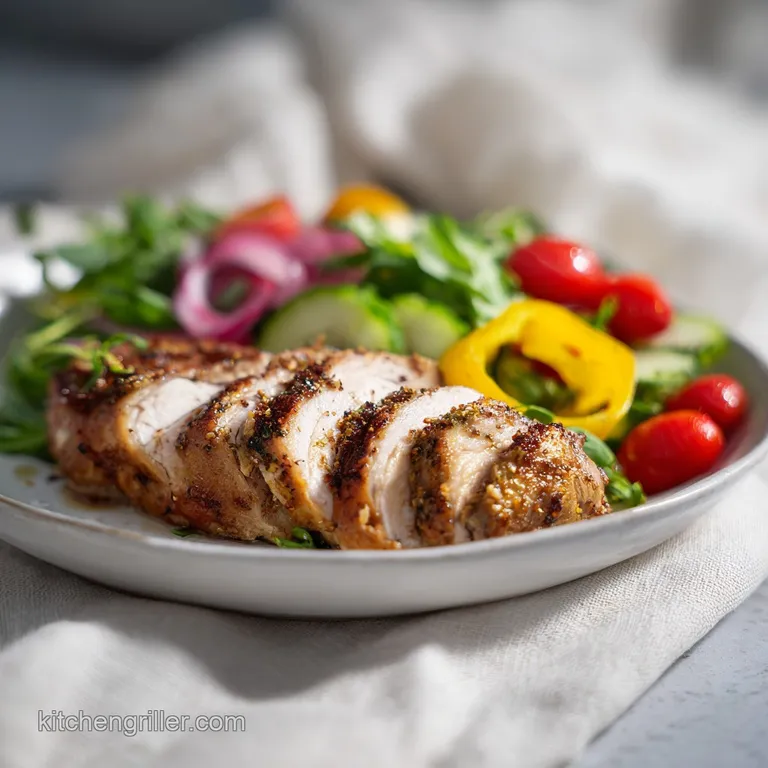
Styling Your Plate for a Cafe Quality Vibe
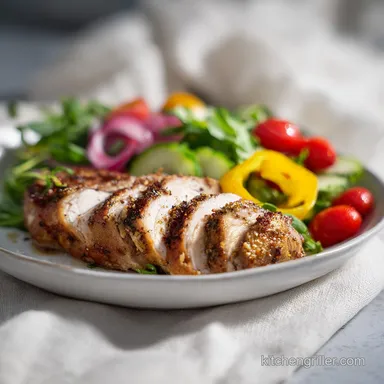
We eat with our eyes first, especially when it's a meal we’ve seen four days in a row. To keep it feeling fresh, focus on color balance. This dish naturally has a beautiful warm palette, but we can make it pop with three specific color accents.
- Vibrant Green: Add the fresh minced parsley and lemon drizzle after reheating. It provides a hit of chlorophyll and freshness that cuts through the roasted brown tones.
- Bright Red: The red bell peppers should be sliced thick so they don't disappear. They provide a glossy, bright contrast to the matte texture of the chicken.
- Electric Yellow: Use the lemon zest. Scatter it over the top right before you eat. Those tiny yellow curls catch the light and signal to your brain that the food is zesty and fresh.
Cafe Quality Plating
If you're eating this at home, don't just dump the container onto a plate. Place a bed of the roasted veggies down first, creating a colorful nest. Set the chicken thigh right in the center. Drizzle the herb oil in a circular motion around the plate rather than just on top.
It looks intentional, sophisticated, and way better than a standard meal prep box.
Best Side Pairings
While this is a complete meal, I love serving it with a dollop of Greek yogurt mixed with a little more garlic and lemon. It acts like a high protein "sour cream" that complements the smoked paprika perfectly.
If you want more crunch, a few toasted pumpkin seeds scattered over the sweet potatoes adds a nutty finish that feels very high end.

Critical in Sodium
1680 mg mg of sodium per serving (73% of daily value)
The American Heart Association recommends limiting sodium intake to about 2,300mg per day for optimal health.
Sodium Reduction Strategies for This Recipe
-
Reduce Added Salt-30%
The recipe uses a significant amount of kosher salt. Reduce the 1.5 tbsp of kosher salt for the chicken by half or even two-thirds, and adjust to taste after cooking. Consider using a salt free seasoning blend to add flavor instead. This will lead to a substantial reduction in overall sodium.
-
Control Seasoning-15%
While smoked paprika, garlic powder, black pepper, and oregano are generally low in sodium, pre-mixed seasoning blends can sometimes contain added salt. Ensure these are pure spices without any sodium additions. Consider using fresh garlic in place of some of the garlic powder for added flavor with less sodium.
-
Boost Flavor with Lemon-10%
The recipe already incorporates lemon juice and zest, which are excellent for adding brightness and flavor. Ensure you're using enough lemon to naturally enhance the taste, potentially offsetting the need for excessive salt. Use freshly squeezed lemon juice, as bottled versions can sometimes contain added sodium.
Increase the amount to 1/2 cup of fresh lemon juice.
-
Fresh Herbs Over Salt
Continue using fresh parsley and consider adding other fresh herbs like thyme or rosemary to enhance the flavor profile naturally. Fresh herbs are sodium free and can contribute to a more complex and satisfying taste.
Recipe FAQs
What internal temperature should I cook bone-in chicken thighs to for meal prep?
Cook them to 175°F. While 165°F is standard safe temperature, the extra heat breaks down connective tissue around the bone, resulting in much more tender meat that holds up better during reheating later in the week.
How do I prevent the vegetables from becoming soggy after four days in the fridge?
Use a wire rack or thick cut onion slices for roasting. This allows hot air to circulate underneath the food, preventing the bottom layer from sitting in rendered fat and steaming. If you enjoyed mastering this airflow technique, see how the same principle applies to crisping skin when making our Lean Bison Burger recipe.
Can I substitute boneless, skinless chicken breasts instead of thighs?
No, you should stick to thighs for meal prep. Thighs contain more fat and connective tissue, which acts as a buffer against drying out during the high heat roasting and subsequent microwave reheating.
How long is it safe to store the cooked chicken and vegetables in the refrigerator?
Store for up to four days in airtight containers. For maximum freshness on day five, it is better to freeze the portions right after cooling on Sunday evening, ensuring the meat holds its texture longer.
What is the most crucial step to ensure the chicken skin is not gummy or flabby?
Pat the chicken surface completely dry before applying the spice rub. Any residual moisture on the exterior will turn into steam in the oven, inhibiting the necessary Maillard reaction needed for crispness.
What high heat oil is best to use for roasting at 400°F?
Avocado oil is the recommended choice. It has a very high smoke point, which prevents the oil from breaking down and imparting a bitter flavor to the chicken and vegetables during the long roast.
How should I serve this to make it taste fresh later in the week?
Finish with a bright, acidic dressing right before eating. A fresh drizzle made of lemon zest, parsley, and good quality olive oil cuts through the richness of the roasted meat and wakes up the flavor profile.
Roasted Chicken Meal Prep
Ingredients:
Instructions:
Nutrition Facts:
| Calories | 662 kcal |
|---|---|
| Protein | 58.1 g |
| Fat | 28.4 g |
| Carbs | 36.2 g |
| Fiber | 8.4 g |
| Sugar | 7.5 g |
| Sodium | 1680 mg |
