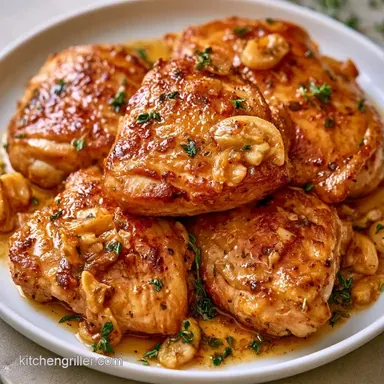
Boneless Skinon Chicken Thighs with Garlic Butter
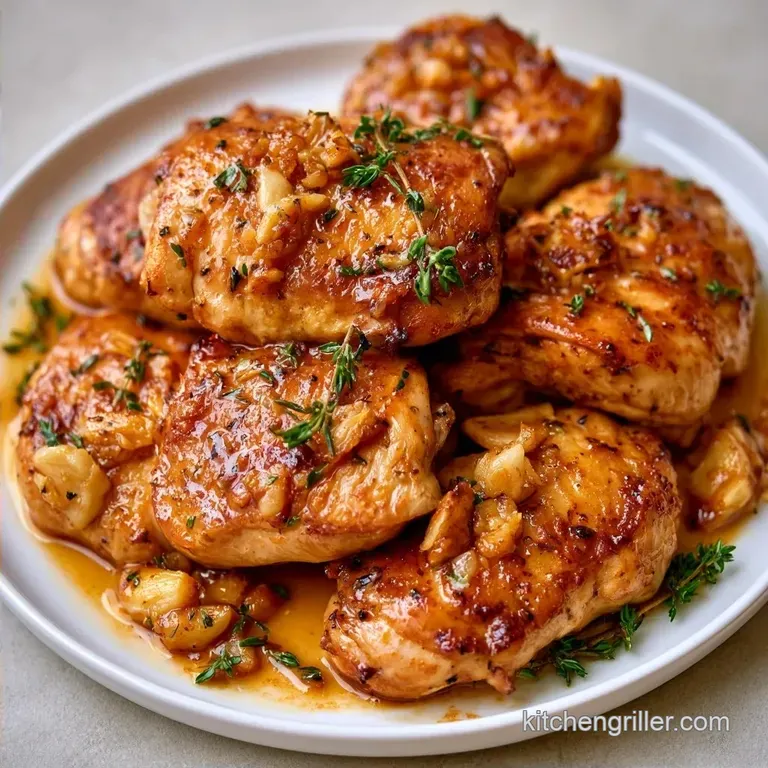
- Time: 10 min active + 25 min cooking
- Flavor/Texture Hook: Mahogany, crackling skin with rich, buttery aromatics
- Perfect for: Fast weeknight dinners that feel like restaurant quality
The sound of chicken skin hitting a hot pan is great, but the sound of it actually crackling is better. For a long time, I dealt with that annoying, rubbery skin that just wouldn't crisp up, no matter how high I turned the heat.
I'd end up with burnt edges and a center that felt like chewing on a pencil eraser. It's frustrating when you're craving that crunch but get a soggy mess instead.
Then I stopped following the "get the pan screaming hot" rule. I tried starting with a cold skillet, and everything changed. The skin doesn't seize up, the fat melts away gradually, and you get this deep, mahogany crust that actually stays crisp.
This Boneless Skinon Chicken Thighs Recipe focuses on a few small hacks to get a huge result. We're using a cast iron skillet and a quick oven finish to make sure the meat hits the safe internal temp without ruining the skin. It's a fast way to get dinner on the table that actually tastes like you spent hours on it.
Why Skin Stays Rubbery
The Cold Start: Putting chicken in a cold pan lets the fat render slowly before the meat proteins tighten. This prevents the skin from curling and ensures it fries in its own oil.
Surface Moisture: Water is the enemy of a sear. If the skin is damp, it steams instead of frying, which is why patting it dry with paper towels is the most important step here.
| Method | Time | Texture | Best For |
|---|---|---|---|
| Cold Pan Start | 25 mins | Shattering, thin crust | Maximum crispiness |
| Preheated Pan | 20 mins | Thicker, tougher skin | Fast browning |
| Air Fryer | 18 mins | Even, dry crisp | Hands off cooking |
The Ingredient List
| Ingredient | Role | If You Don't Have It |
|---|---|---|
| Boneless Skin on Thighs | Main protein | Skinless thighs (won't be crispy) |
| Avocado Oil | over High heat sear | Grapeseed or Canola oil |
| Unsalted Butter | Flavor and basting | Salted butter (reduce added salt) |
| Fresh Thyme | Earthy aroma | Dried thyme (use 1/3 amount) |
You'll need 1.5 lbs of boneless skin on chicken thighs. Get the ones where the skin is intact and not torn. For seasoning, I use 1 tsp kosher salt and 1/2 tsp cracked black pepper.
I suggest 1 tbsp of avocado oil because it doesn't smoke as early as olive oil does. Then there's 2 tbsp of unsalted butter, 3 cloves of smashed garlic, and 2 sprigs of fresh thyme for that classic basting finish.
Cooking Specs
This recipe is built for efficiency. You aren't hovering over the stove for an hour. The total time from fridge to plate is 40 minutes.
The prep takes about 10 minutes, mostly just drying and seasoning. The active cooking on the stove takes about 15-20 minutes, and the oven finish is a quick 5-8 minutes.
According to USDA guidance, the safe internal temperature for chicken is 165°F (74°C), which we'll hit in the oven.
Tools You Need
You really only need two main things: a 10 or 12 inch cast iron skillet and a rimmed baking sheet or oven safe pan. Cast iron holds heat better than stainless steel, which helps keep the skin searing even when you flip the meat.
I also use a pair of sturdy tongs for pressing the meat down and a digital meat thermometer. If you don't have a thermometer, you can poke the thickest part of the thigh; the juices should run clear, not pink. For more on nutrition and meat safety, check USDA FoodData Central.
Step by step Cooking
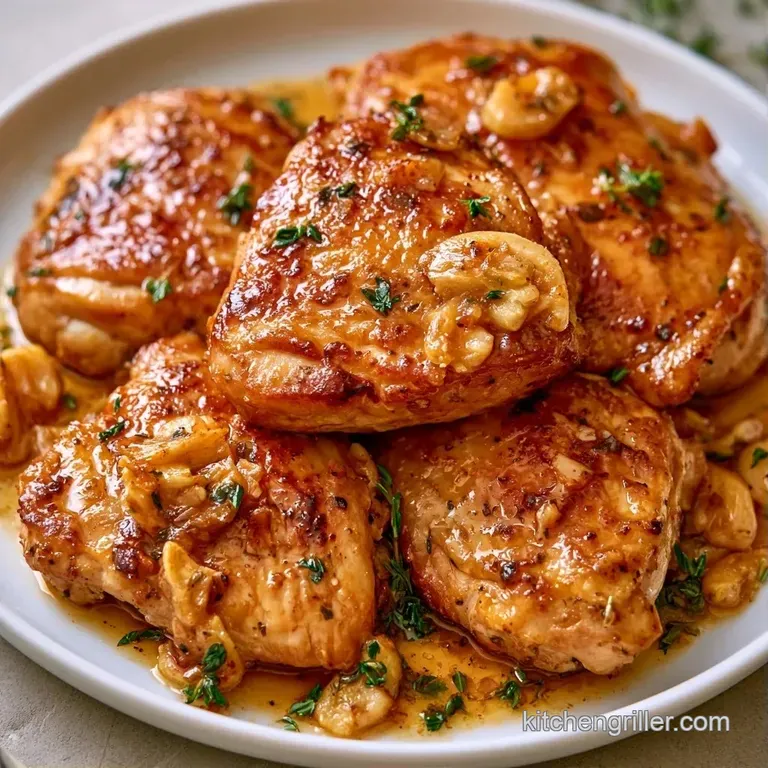
Phase 1: Preparing the Surface
- Use paper towels to pat the chicken skin until it is completely dry. Note: Any remaining moisture will steam the skin and prevent it from crisping.
- Season both sides of the chicken thighs liberally with salt and pepper, ensuring the skin side is well coated.
Phase 2: The Searing Phase
- Place the thighs skin side down in a cold cast iron skillet.
- Adjust the heat to medium. Note: This allows the fat to render slowly.
- Press the thighs down slightly with tongs and cook undisturbed for 8–12 minutes until the skin is mahogany colored and releases naturally.
- Flip the thighs over.
Phase 3: The Finishing Phase
- Promptly add the butter, smashed garlic, and fresh thyme to the pan.
- Spoon the foaming butter over the crispy skin for 1–2 minutes until a nutty and aromatic scent develops.
- Move the skillet into a preheated oven at 400°F (200°C) for 5–8 minutes, or until a meat thermometer reads 165°F (74°C).
- Remove from the pan and let rest on a wire rack for 5 minutes before serving.
Fixing Common Issues
Curled skin usually happens when muscle fibers contract before the skin has a chance to render, typically because the pan heated up too quickly. To prevent this, start with a cold pan and use tongs to hold the meat flat for the first few minutes.
If the chicken is sticking, you're likely turning it too soon. The meat will detach from the cast iron once a proper crust forms. If it feels stuck, wait another 60 seconds.
Burnt Skin, Raw Meat
Excessive stove heat causes this. To avoid it, we use an oven finish; the stovetop is for flavor and color, while the oven handles the internal temperature.
Meat Sticking to Pan
Resist the urge to force it. Wait until the skin is a deep mahogany color and lifts away easily.
| Problem | Fix |
|---|---|
| Rubbery skin | Pat drier and start in a cold pan |
| Meat sticking | Let the skin brown until it lifts easily |
| Burnt exterior | Lower stove heat and rely more on the oven finish |
As this is a quick weeknight recipe, you can modify the results depending on your preference.
| Goal | What to change |
|---|---|
| Extra Crisp | Add 2 mins to the stove sear |
| Leaner Meal | Skip the butter baste |
| More Garlic | Double the cloves to 6 |
Storing and Saving
Keep leftovers in a glass dish in the refrigerator for 3 days. To prevent the skin from becoming soggy, wait until the chicken has cooled completely before sealing the lid.
Avoid the microwave when reheating, as it can make the crispy skin rubbery. Instead, return the thighs to a skillet over medium heat or pop them in an air fryer at 350°F (180°C) for 3-5 minutes to restore the crunch.
To minimize waste, save the pan drippings. Pour the leftover butter and garlic bits over steamed vegetables or stir them into mashed potatoes. Raw thighs can also be frozen for 6 months just remember to thaw them in the fridge overnight before cooking.
The Best Sides
These thighs are rich and salty, so they need something bright or acidic to balance them out. A sharp arugula salad with lemon vinaigrette or some roasted asparagus works great.
If you're looking for something more filling, this pairs well with a Sun Dried Tomato Chicken inspired side of sautéed spinach. , if you want a full feast, serve them over a bed of creamy polenta to soak up the garlic butter.
Flavor Swaps
For a different flavor profile, try a honey garlic glaze. Just mix honey, soy sauce, and lemon juice, then brush it over the meat during the final 2 minutes of oven time. This creates a glossy, sticky finish that is always a hit with kids.
These are already keto friendly for those avoiding carbs; just steer clear of the sugary glazes. If you're in a hurry or lack a skillet, you can make Pesto Chicken Skewers for a similarly rapid meal.
You can also substitute thyme with sage or rosemary. Sage is a fantastic autumn herb that pairs beautifully with the butter baste. For a totally different cooking style, check out my Baked Pesto Chicken for a simple one-pan oven dish.
Debunking the "Seal In" Myth
It is commonly claimed that searing meat "seals in the juices," but this is a misconception. Searing is actually about developing flavor and a nice crust, not preventing moisture from escaping. The meat stays juicy because we avoid overcooking it and allow it to rest.
The Room Temp Myth
You'll often hear that meat must reach room temperature before cooking. For chicken thighs, however, this has no meaningful effect on the final internal temperature. Just ensure the meat is patted dry.
Recipe FAQs
Do boneless skin-on chicken thighs exist?
Yes, these are available at most specialty butchers or can be custom cut from bone-in thighs.
Tip: check the meat counter specifically if you do not see them in the pre-packaged section.
Can baking boneless chicken thighs at 350°F produce better results than 400°F?
No, this is a common misconception.
Tip: stick to 400°F to ensure the skin stays crisp while the meat quickly reaches 165°F.
How to prevent chicken skin from sticking to the skillet?
Press the thighs down slightly with tongs during the first few minutes of cooking.
Tip: wait for the skin to release naturally from the pan before attempting to flip.
Is it true that a preheated hot pan is necessary for crispy skin?
Not true.
Tip: starting with a cold skillet allows the fat to render slowly for a more mahogany color.
Which side dishes complement this buttery chicken?
Fresh steamed greens or a savory pasta balance the richness well.
Tip: if you enjoyed the garlic butter technique here, see how we use savory notes in our pesto chicken pasta.
Boneless Skinon Chicken Thighs